MasterTig
A premium TIG welding machine with a 7 inch colour panel and guided Weld Assist setup, and the start of a new design language for Kemppi.
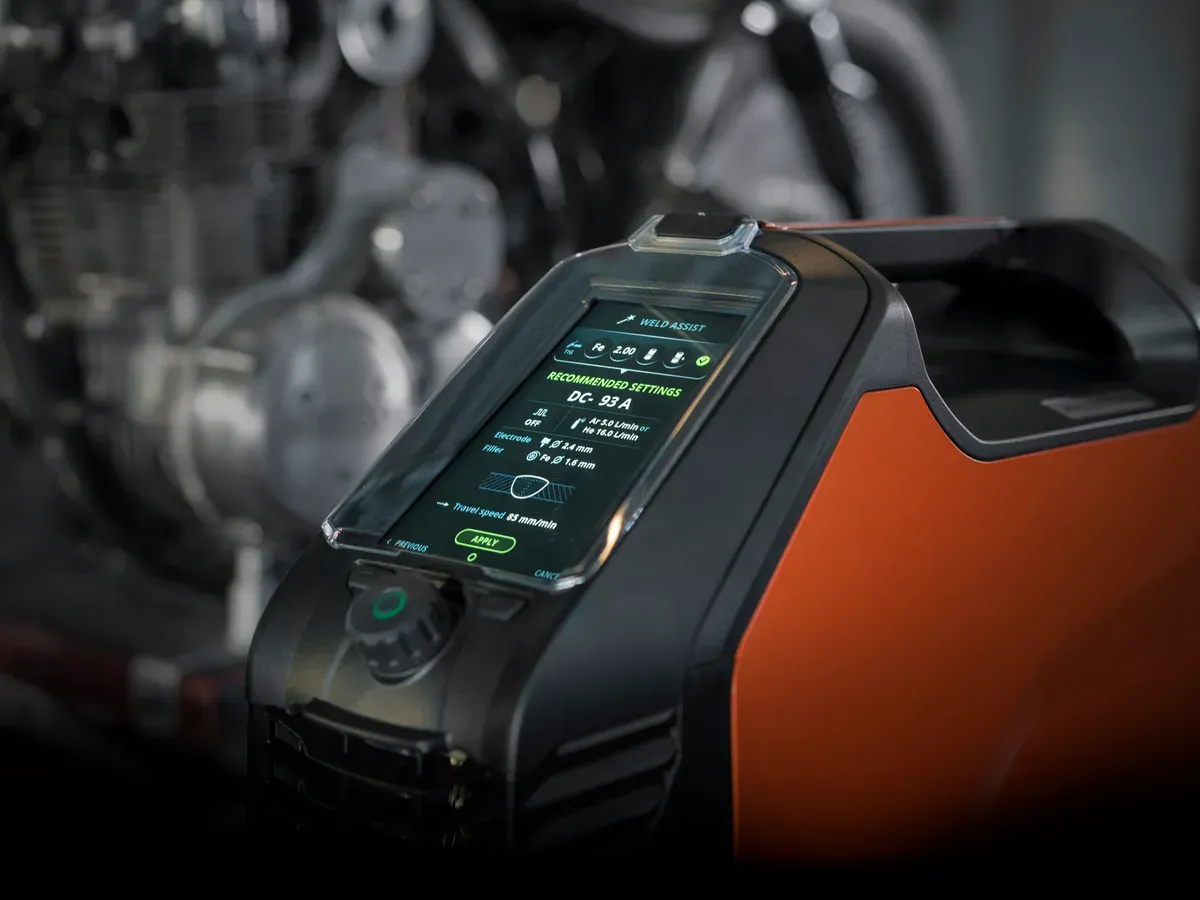
- Red Dot 2020Product Design AwardMasterTig and Flexlite TX torch
- Summer 2019Launch of the new MasterTig
- 7 inchColour display with guided Weld Assist
On this page
A new line, from scratch
I joined Kemppi at the beginning of 2016 and worked on MasterTig with a compact team of designers and engineers. The brief was to explore the new line from scratch: replace the older product family, meet recent user and market needs, and set a new design language for upcoming products.
I was chief designer for UX and concepts, and the main designer of the MasterTig family. Mechanical engineers, software engineers and electricians worked closely with the design team on the details.
Weld Assist in action
Kemppi’s own film of Weld Assist on the MasterTig. It loads from YouTube when you press play.
The problem Weld Assist solves
Good TIG settings depend on many things at once: the base material, the joint, the position and more. Welding procedure specifications exist for this. Weld Assist puts that guidance in the machine.
- Recommendations are based on welding tests and welding standards, according to Kemppi.
- Kemppi says it saves time and reduces test pieces and scrap, and that a trained operator can make the selection in a couple of seconds.
Try Weld Assist
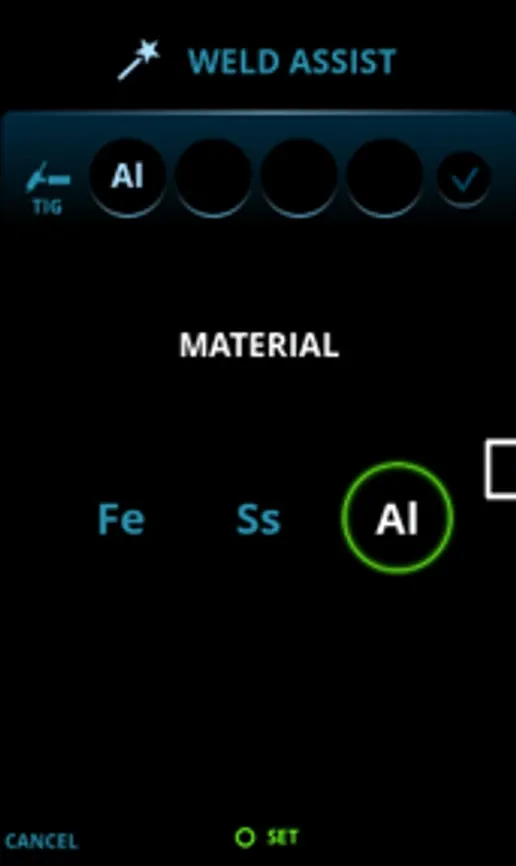
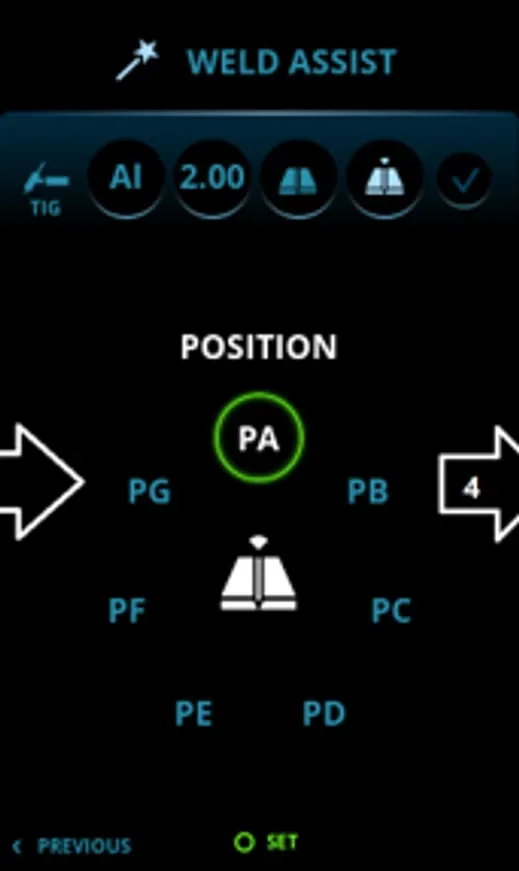
The wizard runs on the 7 inch display with one knob and two function keys. Use the same three controls below: Press moves on, Previous steps back, Cancel starts again. Every screen is the real one.
Step 1 of 5
Base material
Choose the material. Aluminium is not offered on the DC models, where the choice is steel and stainless steel.
- Fe, mild steel
- Ss, stainless steel
- Al, aluminium
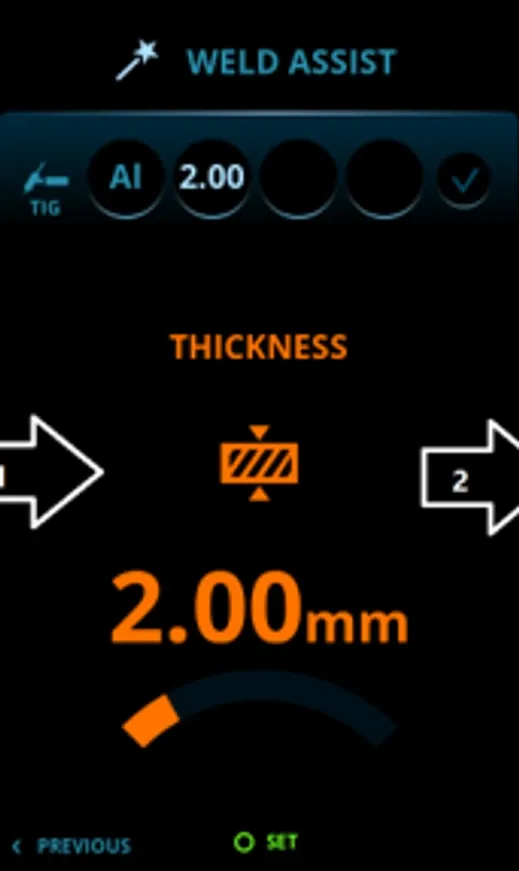
Step 2 of 5
Thickness
Set the thickness, from 0.5 to 10 mm. It influences the welding current and the groove shape the assist function chooses.
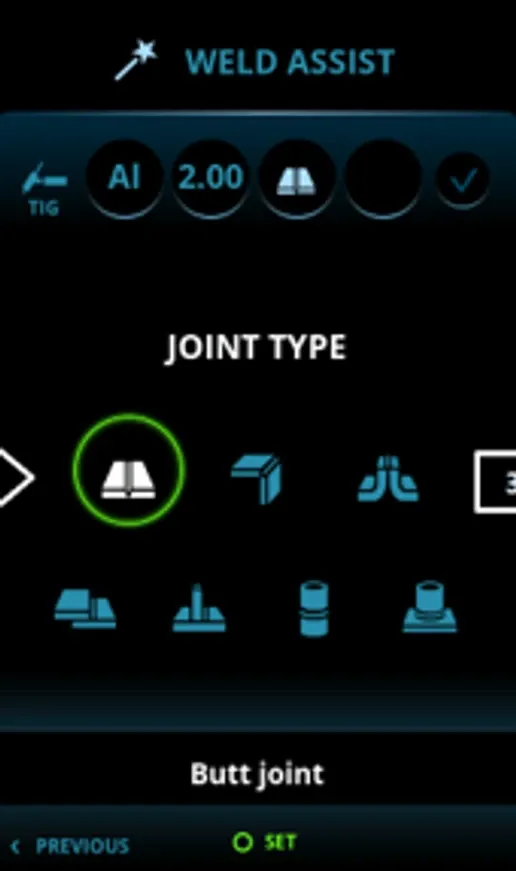
Step 3 of 5
Joint type
Pick the joint. Each one is drawn on the screen, and the list covers the joints used for sheet, plate and pipe.
- Butt
- Corner
- Edge
- Lap
- Fillet
- Tube
- Tube and plate
Step 4 of 5
Position
Pick the welding position. Graphics show the joint and the position, so nobody needs to know the codes used in welding standards.
- PA
- PB
- PC
- PD
- PE
- PF
- PG
Step 5 of 5
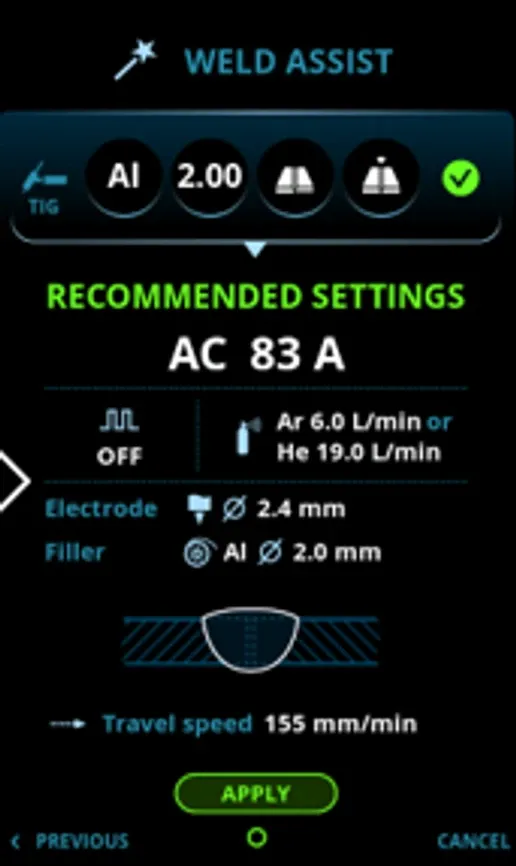
Recommended settings
The wizard ends on one screen with everything needed to start, and your four answers stay in view above it. Tap a number to see what each part is for.
The row at the top repeats the material, the thickness, the joint and the position, with a tick, so the settings below can be read against the job.
The headline is the current type and level, AC 83 A in this example. The machine picks AC or DC itself, and the level depends on the machine.
Shows whether pulse is used, and sets the frequency if it is. Here it is off.
Shielding gas flow in litres a minute, for argon or for helium.
The electrode diameter, and the filler material and diameter when filler is used.
A drawing of the joint, and the number of passes. Kemppi lists the groove type and pass profile among the recommendations.
How fast to move along the joint, in millimetres a minute.
Apply confirms. Previous steps back one question, and Cancel returns to the start. All of it is done with the knob and the two keys.
The rules behind the screens
Show the processUX rules
Kemppi’s interfaces follow a few fixed rules. Jussi Kapanen, Kemppi’s User Experience Manager, set them out in a 2020 article, and he is credited with the design team on the MasterTig Red Dot certificate.
- One way to select, across Kemppi’s digital interfaces: turn the knob and press.
- Colour carries meaning. Blue is for navigation, and orange only for adjustment mode.
- A stable symbol language, with the interfaces localised in 15 languages.
- A simple interface for most people, and a quicker path for heavy users.
- Pilot versions run for several months in customers’ real production before launch, and the hardware goes through harsh tests such as extreme temperatures and drops.
The machine, up close
Photography from the Red Dot submission. It drifts slowly; hover or press pause to hold it, and press a photo to open it full size.
Designing for the user
The shift was from “a product for the process” to “a product for the user to do the process.”
- Build the product around the user experience.
- Make the machine interactive and user-centred, as a newly launched product, while still meeting the needs of a portable TIG solution.
- Welder feedback was the main source of inspiration.
- Treat failed experiments as part of learning.
Three details in the hardware
Three decisions shaped how the machine is used. Press an image to open it full size.
Display and controls
One control panel option is a large graphical display with assistive technology, which helps users find the right TIG parameters for different applications.
Torch ergonomics
The Flexlite TX torches are shaped to the hand and designed for both right-handed and left-handed welders.
Portability and storage
The machine was made smaller and more compact, and the empty space inside the handle became storage for consumables.
Decisions and what they cost
Three choices that shaped how the machine is used.
A large graphical display with guided setup
- What we chose
- A 7 inch colour display with Weld Assist, which helps welders find the right TIG parameters.
- What it cost
- A display adds a layer between the welder and the machine, so the guidance has to be quicker than turning a knob.
- What followed
- Welders who are learning, novices and professionals can each use assistive technology the way that suits them.
One torch for both hands
- What we chose
- Shape the Flexlite TX to the hand, for right-handed and left-handed welders.
- What it cost
- One shape had to work for both hands.
- What followed
- The Flexlite TX torch won a Red Dot Award in Product Design, with the MasterTig.
Smaller, with storage in the handle
- What we chose
- Make the machine more compact, and use the empty space inside the handle for consumables.
- What it cost
- A compact body leaves little room, so unused space had to do a job.
- What followed
- A portable TIG solution that still carries what the welder needs.
Who it helps
Depending on their experience, welders can use assistive welding technology in the way that suits them best.
- Welders who are learning: it helps make sure welding standards and best practices are followed, and regular use builds an understanding of how the variables change in different TIG applications.
- Novice welders: they may not know which current type to use or what each application needs. Weld Assist gets both right automatically and gives satisfactory results without trial and error.
- Demanding professional work: near-optimal settings are quick to reach without earlier experience or a separate learning period for new materials, joint types and positions. Many variables can be read from the display at a glance, so preliminary welding procedure specifications are quick to produce.
What I took from it
What this taught me about the product
Weld Assist was an early lesson in guided automation.
- A novice may not know which current type to use. The machine asks four questions and proposes settings, so the choice does not rest on expertise.
- The settings end on a screen the welder can read at a glance, so the suggestion stays visible instead of hidden.
- Graphics for joint type and position remove the need to know the abbreviations, which is a legibility decision as much as a layout one.
Recognition
MasterTig launched in summer 2019 and, according to Kemppi, was received positively by welders. The MasterTig and the Flexlite TX torch both won a Red Dot Award in Product Design.
- Red DotProduct Design Award 2020MasterTig and Flexlite TX torch
- 2019LaunchSummer
- 10,000+Entries to the Red Dot each yearFrom more than 50 countries and regions
The certificates
The Red Dot certificates credit the in-house design team: Pekka Airola, Jari Kettunen, Omkar More, Jussi Kapanen (Kemppi’s User Experience Manager) and Tapio Hujala.
In motion
Two films from Kemppi. They load from YouTube when you press play.
In use
Photography by Kemppi. Press an image to open it full size.